Refrigerator Water Filter Leaking? Find Which of the 6 Leak Points You Have (and the Fix for Each)

A leaking refrigerator water filter is a diagnosis problem before it is a repair problem — water appears at the dispenser area, but it can be escaping from six different points, and each has a different fix, cost, and urgency. The first move is not tightening anything: it is locating the leak’s actual origin, because the puddle under the fridge collects from all six and points at none of them. This page is a leak-point triage tree: identify where the water exits, match it to the cause, and apply the fix — with the just-changed-the-filter special case (four causes unique to the hour after a swap) handled separately, since that is when most leaks start.
This topic is where the free-internet failure is loudest: search results are dominated by paid Q&A previews (“I replaced my filter and now it’s leaking everywhere — JustAnswer techs answer now”) and scattered brand threads. Nobody assembles the full leak map. The reason the paid answers sell is that a wrong guess here costs a floor — so the map below front-loads the one thing every scenario needs: shut the supply valve behind the fridge first, diagnose second. The valve is at the wall or under the sink; sixty seconds of prevention beats an hour of mopping.
Quick Answer: The 6-Point Leak Triage

Water visible here → probable point → first action:
| Where water appears | Leak point | Likely cause | DIY? |
|---|---|---|---|
| Dripping from the filter housing seam/slot itself | 1. Filter head junction | Old O-ring fragment, unseated cartridge, scored bore | Yes — clean & reseat |
| From the cartridge body, center or cap | 2. Cracked cartridge | Over-torqued install, freeze damage, defective clone | Yes — replace cartridge |
| At the coupling where the house line meets the fridge (behind, at the wall) | 3. Supply fitting | Loose compression nut, worn ferrule, split tubing | Yes — tighten/replace ferrule |
| Down the freezer or fresh-food back wall, inside | 4. Interior water line / tank | Split reservoir tank, pinched line at hinge (door models) | Part-replace, moderate |
| Around the dispenser paddle / drip tray overflow | 5. Dispenser area | Overfilled tray, slow drip from inlet valve seat | Yes — tray/inlet valve |
| Under the front of the fridge, no visible path | 6. Defrost drain or ice-maker fill | Clogged drain tube, misaligned fill chute — not the filter at all | Yes — drain clearing |
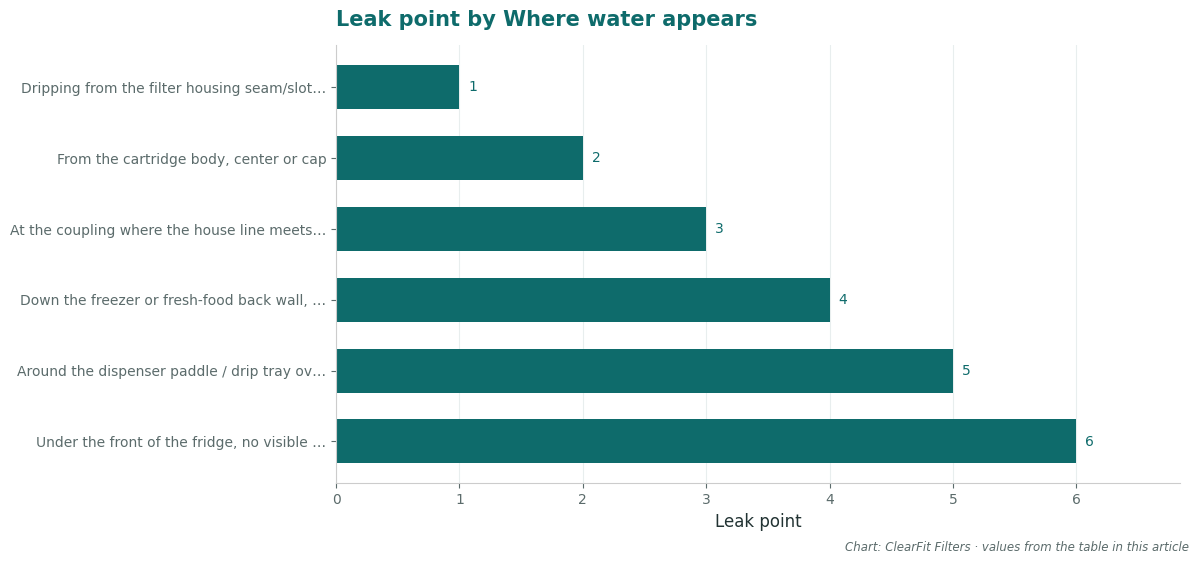
Row 6 is the trap: most “filter leak” panics are defrost-drain water, which never touched the filter. The discriminator is simple — water from the dispenser circuit is cold, clean, and tastes like water; defrost-drain water is room-temperature, dusty, and often smells. And if it only appears during the ice-maker fill cycle (a periodic trickle, not a constant weep), the fill chute or the drain is the suspect, regardless of when you last touched the filter.
The Just-Changed-the-Filter Case: 4 Causes Unique to the Hour After a Swap
Half of all filter-leak episodes begin within an hour of a cartridge change, and they have their own cause list. If your leak started right after a swap, work this section before the general tree:
Cause 1 — a piece of the old O-ring stayed in the housing. The #1 post-swap leak, period. The old cartridge’s O-rings age, bond, and sometimes tear — half a ring stays in the bore when the cartridge comes out. The new cartridge then seats against rubber debris: never sealing, weeping constantly from the housing seam. Fix: pull the new cartridge, flashlight into the bore, fish the black rubber fragment out with a bent paper clip or needle-nose, wipe the bore, reseat. Two minutes, zero parts. (This is also why rough extractions cause leaks later — see stuck-filter extraction for why fragments get left.)
Cause 2 — the new cartridge is not fully seated. A twist cartridge stopped an eighth-turn shy of the lock, or a push-in cartridge shy of the click, leaves the inlet valve partially unseated. Symptoms: drip from the housing neck plus the filter status light refusing to reset (the same unseated switch causes both). Fix: reseat to the positive stop. If it will not reach the stop, the cartridge is the wrong generation for the housing — a compatibility problem, not a force problem.
Cause 3 — the protective cap stayed on the new cartridge. Replacement cartridges ship with sanitary caps over the O-ring end. Installing cap-on is embarrassingly common (it is the second Google-suggested phrase after “fridge leaking” on brand forums) and produces an immediate, steady drip. Fix: remove, reseat. Also check the old cartridge’s decorative cap did not transfer somewhere it should not be.
Cause 4 — a tolerance-stack clone cartridge. Budget compatible cartridges occasionally run marginally out of spec: seated fully, locked positively, and still weeping because the O-ring lands 1mm off its seat land. Discriminator: the drip survives a verified-clean bore and a verified-full seat with the genuine cartridge test. If a genuine cartridge (borrowed, or bought once) seals dry, the clone geometry was the cause. Fix: change cartridge tier — the OEM vs aftermarket guide covers what “compatible” legally means and what to check.
Leak Points 1–6: Symptoms, Mechanism, Fix
1. Filter head junction (housing seam). Weep or drip at the slot itself. Mechanisms: retained O-ring fragment (above), unseated cartridge, or a scored housing bore from a past rough extraction — scoring is the one that does not fix with cleaning; the bore is the sealing surface and a groove in it weeps forever. Scored-bore test: clean bore, genuine cartridge, full seat, still weeping → housing replacement ($80–200 part+lab, model-dependent) or a bypass plug + upstream inline filter as the workaround.
2. Cracked cartridge. Water from the cartridge body itself, often a hairline visible under a dry towel wipe. Mechanisms: over-torquing the install (“tighter is not more sealed” — the O-rings do the sealing, torque only cracks plastic), a frozen line bursting the cartridge from inside (garage fridges in winter), or a brittle clone. Fix: replace the cartridge; check the fill line for the freeze root-cause if that was the mechanism.
3. Supply fitting at the wall. Drips at the coupling behind the machine. Mechanisms: compression nut backed off (vibration over years), a worn ferrule that no longer crush-seals, or tubing split at the fitting from repeated bending. Fix: valve off, nut a quarter-turn snug (not gorilla-tight), replace the ferrule if it still weeps, trim split tubing back and re-seat. This is plumbing 101, not appliance repair.
4. Interior line / reservoir tank. Water running down the back wall inside the fresh-food or freezer compartment. Mechanisms: a cracked reservoir tank (the coil of tubing behind the crisper on many models) or a line abraded at a door hinge on door-water models. Fix: part replacement — tank kits are model-specific and moderately DIY-able (panel off, splice, clip); hinge lines are harness-replacement jobs. This is the point where “filter problem” diagnoses die: the filter was never involved.
5. Dispenser area. Water around the dispenser paddle or overflowing the drip tray. Mechanisms: a slow internal drip from the inlet valve seat (worn valve weeping past its seal — replace the inlet valve, a $30–60 part), or simply a drip tray that filled past its capacity (they hold a few ounces; a family that “pre-chills” cups full of the dispenser overflows them constantly). Discriminator: does it drip with the fridge idle, or only around dispensing? Idle-drip = valve; dispensing-time-only = tray habits or a misaligned chute.
6. Defrost drain / ice-maker fill. Puddle at the front with no visible path. Mechanisms: the defrost drain clogs (food debris, biofilm), the defrost meltwater overflows the drain pan and runs forward under the crisper drawers; or the ice-maker fill chute mis-directs water during fill. Fix for the drain: locate the drain hole at the back of the freezer floor (or behind the rear evaporator panel on some models), flush with warm water, clear with a flex-rod or turkey baster + pipe-cleaner. This never involves the filter — and every filter-leak panic thread contains at least one reply asking “are you sure it’s the filter?”
When to Stop DIY-ing
Two findings end the DIY phase: water inside the door panel or cabinet insulation (any leak you can see the path of but cannot reach the source of — mold risk compounds daily), and a scored filter housing bore (the geometry is gone; parts, not cleaning). Both are standard appliance-service calls. Everything else on this page — the four post-swap causes, fittings, trays, drains — is genuinely owner-fixable with hand tools and a towel.
Prevention (the 30-Second Habit)
Every cartridge change: flashlight the bore before inserting (fragments), fingertip of food-grade silicone grease on the new O-rings (prevents the bond-tear cycle), seat to the positive stop and no further (torque cracks), and towel-test the first dispense. The flushing guide covers the rest of the post-swap sequence; the Home Filter Calendar keeps the six-month cadence so O-rings never age into the tear zone.
FAQ
My filter is leaking from the top where it meets the fridge. Replace the filter?
Not yet — that exact symptom is most often a retained O-ring fragment or an incomplete seat, both fixed by pulling the cartridge, cleaning the bore, and reseating. Replace only after a clean-and-reseat fails; then suspect a scored bore (housing, not cartridge).
Why does my fridge leak only when the ice maker fills?
That pattern points away from the filter entirely — fill-chute misalignment or a defrost drain overwhelmed during the fill cycle. Watch one fill cycle with the freezer drawer open; you will see where the water goes.
Can a water filter leak be dangerous?
The water itself is no more dangerous than your tap water. The danger is the destination: water reaching flooring, cabinetry, or the machine’s electrical compartment. That is why the supply valve comes first in every scenario — an unattended weep overnight is how a $2 O-ring becomes a $2,000 floor.
Do aftermarket filters leak more than OEM?
Out-of-spec clones are overrepresented in the “seats fully, still weeps” class (tolerance-stack failures), while genuine cartridges in a damaged bore leak exactly as badly as clones. The bore’s condition dominates the statistics; the cartridge tier matters at the margin. Check both, bore first.
Sources & References
- Brand owner-support leak troubleshooting pages (Whirlpool/Product Help, GE, Frigidaire owner resources) — per-brand subsets of the points above; consolidated here. Official documentation.
- r/appliancerepair & JustAnswer public previews — post-swap leak patterns, retained-fragment frequency, drain-misdiagnosis cases. Community discussion (paraphrased).
- O-ring seal mechanics & silicone grease practice — standard plumbing/appliance practice; Industry expert analysis.
- Housing/inlet-valve part cost bands — parts-channel ranges; inference (ranges, not official quotes).
- LG 2025 notch-related compatibility note — compat-risk library; Official documentation/Community discussion mixed; see the stuck-filter article.
Related Guides
- Whirlpool Water Filter Stuck? 5 Fixes — extraction without leaving fragments behind.
- Water Filter Light Stays On After Replacement — the other symptom an unseated cartridge causes.
- Refrigerator Water Filter Bypass Plug Guide — the scored-bore workaround.
- How to Flush a Refrigerator Water Filter — the rest of the post-swap sequence.
Shop this guide: Refrigerator water filters – all brands